What’s Happening Today 16 July 2013

Hi All,

Most of my previous posts have been about cooking or my 1900 house rehab. But today I just want to catch you all up and tell you why I haven’t posted any more on those topics. And I just feel like talking. Yes, I went to work today and talked alot – about business and a bit about how co-workers backstab, management stinks and – you know – normal office stuff. Although I did find out one of my coworkers had been a aviation navigator – I thought there was something ultra cool about him – besides him being pretty hot. Hey – I’m a grandma, not dead LOL. Sat beside another cutie on a recent air plane ride. I’ll remember those blue eyes for a while. We had a nice conversation over a couple of Jim and Cokes.

Annywhoo  – I haven’t posted any more cooking articles because 1) I went out of town for July 4th and didn’t cook (cocktails don’t count) 2) I’ve had a bad cold (finally going to doctor tomorrow) 3) My kitchen is now super hot.

I did try another variation on the Onion Dill Rye bread using 2 cups rye flour and 1 cup white flour. It was horrible. I’m not sure what caused the trouble — but I threw it away. I also made my famous potato, onion and chicken sausage dish. It was great as usual but I forgot to take the pics for the blog post. I’m blaming both failures on my cold.

My kitchen — whole house really — is super hot. I currently rent a huge pile of bricks that was built in 1954. The air conditioner doesn’t cut it in the middle of the summer – and with it being 95ish out now, well, the kitchen is a torture chamber. I may not cook much at all until September. We’ll see.

My 1900 rehab house – the drywall is done, the front porch foundation is patched but the boys left a hole in the basement foundation. Argh. So some rain got in the basement — not terrible but with the drywall done, I certainly am worried about my investment being ruined due to mold. I’m not pleased about that. They want to put in a sump pump because the basement is wet. Hmmm. And there is still a cat in there somewhere — I saw its paw prints in the drywall dust. Not pleased with that either. The boys say they’ll take a trap over to try to catch it (humanely of course!).

I just received a new assignment at work (after being passed over for a promotion – but I’m not bitter). I actually get to do both jobs for a while until a new person can take over my current duties. So – the new job will be much better I think. I’ve also applied for another job that just might (fingers crossed) move me closer to my 1900 house. Wouldn’t that be awesome? I just keep saying to myself – sometimes you don’t get what you want, you get what you need.

Humph right – why is it that what I need is never what I want? Weird.

One last thing – I’ve been waiting seven months for my divorce to be final — will it never end? Lawyers Argh

My first divorce took 6 weeks – this one — seven months  — seriously? Both no-fault, different states. Ridiculous

Thanks for listening!
GramCeesHouse Apple Turnovers

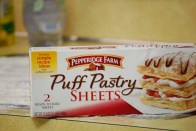
I asked you to help me decide what to make this weekend – you said apple turnovers. It would seem easy – some dough and some apples. Not so fast! These require puff pastry dough. So I had to decide — should I make or buy puff pastry? I’d made puff pastry before – not hard but seriously time consuming. So, I opted for the frozen pre-made puff pastry sheets.

Puff Pastry Sheets

Puff Pastry Sheets

Even using these sheets, there are some pitfalls to making turnovers. But it’s not too hard – just follow the recipe and the steps and you’ll get an excellent result. The recipe I followed came from my trusty Joy of Cooking cookbook. Here are the steps I used:

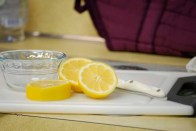
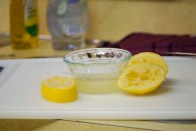
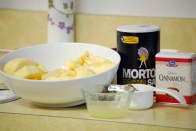
Step 1: Assemble the ingredients. If you’ve been reading my posts, you’ll have noticed this is always my first step. The pastry will have to thaw prior to using – the time it takes to thaw depends on your room temperature.  I removed them from the box and set aside to thaw. Peel the apples and set aside. Toss the apples with the flour, cinnamon, sugar, salt and lemon juice. Put bowl into the refrigerator until needed. TIP: You can make the apple mix ahead of time.

Peeled Apples

Peeled Apples

Lemon

Lemon

Lemon Juice

Lemon Juice

Apple Turnover Filling Ingredients

Apple Turnover Filling Ingredients

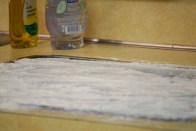
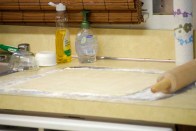
Step 2: Prepare the rolling surface. I’m all about quick cleanup. So I cover my surface with plastic wrap. To make it stick, put some water drops on the surface and then cover with the plastic wrap. Sprinkle it with flour to keep the dough from sticking.

Rolling Surface Prep

Rolling Surface Prep

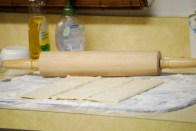
Step 3: Roll the pastry dough into an approximate 10 by 10 square. The frozen dough will have fold marks in it when you lay it out. Using wet fingertips, pinch these edges together and then roll. TIP: Make sure you flour your rolling pin and start slowly – the dough may want to roll up onto your rolling pin. If this happens, just roll it backward until it falls off. Reflour your pin after each pass at the beginning. After a few rolls, the dough won’t stick.

Start Pastry Rolling

Start Pastry Rolling

Rolled Pastry

Rolled Pastry

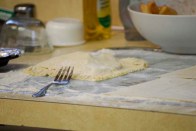
Step 4: Fill and close. As per the recipe, cut the square into four smaller squares, turn over, put filling into the center, paint two edges with lightly whipped egg, fold and seal with a fork.

Sealed Turnover

Sealed Turnover

Step 5: Ready for baking. Transfer triangle to a baking sheet. Repeat for the other three squares. Cut three small slits the tops. Brush tops with egg white and sprinkle cinnamon and sugar. Put pan into refrigerator.  The pastry needs to be firm when it is put into the oven; cooling it will make it firm again.

TIP: Remove first pastry sheet rolling surface plastic wrap and throw away.

Rolling Cleanup

Rolling Cleanup

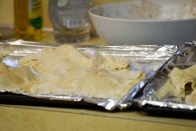
Step 6: Repeat Steps 2 – 5 for the other pastry sheet. You will have 8 triangles ready for baking. You’ll notice I use foil lined pans; this makes for easy cooling and pan clean up.

Turnovers Ready for Oven

Turnovers Ready for Oven

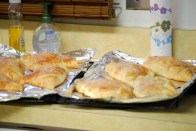
Step 7: Bake. I followed the recipe — 15 minutes at 400 and then 15 minutes at 350. I changed the pans top to bottom and bottom to top when I changed the temperature to help keep the bottoms from burning and to give an even top color.

Step 8: Remove and cool. After removing from the oven, transfer the foil sheets (with the turnovers on them) to wire racks to cool. When they are cool enough to handle, remove from the foil to the serving plate.

Turnovers Cooling

Turnovers Cooling

With this batch I had one ‘ugly’ triangle – the dough kept splitting when I folded it. But it still tasted great.

Thanks for helping me decide to make apple turnovers today.

Enjoy!

The Onion Dill Rye Quest

How can I make an authentic rye bread with those onion and dill undertones? That is what I asked myself after sampling a loaf made by a local commercial bakery. It was caramel colored, soft crusted, denser than white but just a touch sweet – and the onion and dill flavor of course. So far I’ve made two attempts — the second coming close. Here are the steps I took:

Loaf One – Hearty German Rye

I bought my bag of rye flour and on the back was a recipe for a hearty German style loaf. I thought, OK I’ll try it and add my modifications. The original recipe is here.  I halved it, didn’t have any gluten or caraway and added 1 tsp. dill and 1/2 cut of onions.

Step 1: Assemble the ingredients.

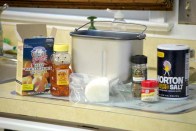
ger_rye_ing

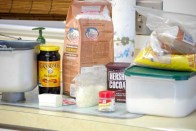
Hearty German Rye Ingredients

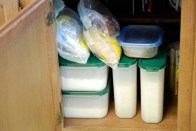
In the right side of the photo, you’ll notice a container. I keep all my baking products in containers and zip lock bags. This keeps things organized and deters bugs. In the left side of the photo, notice the bread machine container. I always pull the container out of the machine to add the ingredients; it helps keep the machine clean.

baking_storage

Baking storage

Step 2: Fill the container and bake. I put the dry ingredients into the container – making a hill in the center with the flour. Next, put the wet ingredients (except the yeast and water) around the sides of the flour hill. Dissolve the yeast in the very warm water in a measuring cup and let it stand for a minute. Make a well in the flour hill and pour the yeast water into the well. Let it set for a minute; this lets the yeast start working. Carefully carry the container over to the machine and snap it into place.

bread_machine

Bread Machine

Set the machine to a light crust and start the machine. Three hours later – your bread is done.

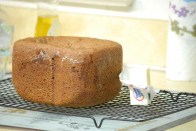
Step 3: Remove and cool the bread. Take the container out of the machine and invert over a wire rack. Let cool.

germ_rye_out

Bread on cooling rack

The machine’s kneading arm remains in the bottom of the loaf. I’m not sure if all bread machines do this — this is an old machine and I haven’t explored newer models. Removing it unfortunately leaves a hole in the loaf at that location. I usually rub some butter on the top crust.

Step 4: Cut and bag. Using a bread knife, cut the bread into slices. You may want to just tear it apart – that’s up to you. I like to use mine for sandwiches. If you have too much, bread freezes well. TIP: I slice, then freeze so I can take out just as many as I need at a time.

germ_rye_cut

Cut bread with butter

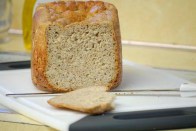
So, how was it you ask. Hmm, not so good. The color and denseness ware excellent. However, it had (to me) a strange taste – I couldn’t taste any dill and where was that rye flavor? I’m sorry to say I threw this loaf away.

Loaf Two – Basic Rye with Onion and Dill

After the failure described above, I did some research – seems that the actual flavor for which I searched was produced by caraway seeds. Who knew? So, off to the store I went and bought some caraway seeds. I’m not a fan of seeds in bread – that’s just me. The store didn’t have any ground caraway. So, then I go to my local department store and look for a spice grinder. (You’d think I’d have one huh?) They didn’t have one — but they did have a mortar and pestle.

mortar_pestle

Mortar and Pestle

Ok, I thought, I can grind them myself the old fashioned way. Big mistake! I got a blister and didn’t get much grind. So I decided to use the seeds as is and see if it results in the proper flavor. I’ll get a real spice grinder next time I’m at a larger department or kitchen store.

Step 1: Assemble the ingredients. I used my trust Joy of Cooking cookbook and found the Dill Bread recipe in the Yeast breads section. Cottage cheese – in bread – who knew? I changed the bread ratio to 2 cups white and 1 cup rye. I also added 4 tsp of gluten.

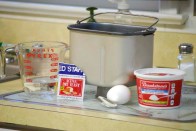
rye_ingred

Basic rye bread ingredients 1

rye_ingred_2

Basic rye bread ingredients 2

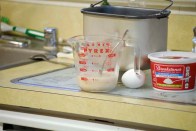
rye_yeast

Dissolving yeast in warm water

Step 2: Assemble and bake. This step is exactly the same as Step 2 above.

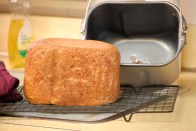
Step 3: Remove and Cool. Again, same steps as above.

rye_out

Remove rye bread from machine

rye_cut

Slice basic rye bread

This time the flavor came very close to my ideal and it wasn’t quite dense enough. Unfortunately the hole from the bread machine arm cost me some slices in the middle. The dill isn’t as sharp as I’d like and I’m not a fan of the seeds. So, I’ll be looking for a spice grinder and perhaps I’ll be able to find some fresh dill.  I’ll increase the ratio of rye to white flour as well. That will be my next attempt.

I’ve decided to make croutons with the slices that weren’t whole due to the machine arm. I’ll write about that in another post.

Happy baking!
Poll – What to make next?

This weekend I made my Crock Chicken Pot and Crock a Chuck Roast. I feel like trying something new. The three things I’m considering were inspired by several things:

1 – While watching MasterChef, I realized I’d never made a hollandaise sauce – that looks like a challenge.

2 – While shopping at Trader Joe’s the other day, I saw some beautiful Gala apples. I thought of apple turnovers – my mom used to make these all the time. She is gone now but this is her birthday month so I’ve been thinking about her quite a bit.

3 – There was a restaurant in a place I lived once that had the most amazing quiches. I’m not sure how this popped into my mind but there it is … 🙂

Help me decide which one to make next by voting here!

Update: Thank for voting. I’ll close this poll on Friday June 28, 2013 at noon.

Update: So apple turnovers it is! Look for the post about it sometime tomorrow. Thanks for voting.


GramCeesHouse Chicken Salad

I’ve been a fan of Boar’s Head deli meats for quite some time. However, the prices are getting a bit much and I’ll soon be moving to a location that doesn’t have a Boar’s Head deli. So …. I need to make my own chicken for quick meals instead of living off of deli meats. Even with the lower sodium varieties, deli meats are still pretty salty.  One of my favorites is Chicken Salad on Rye with a slice of Havarti. That’s an any time meal as far as I’m concerned. Here are the steps for make my Chicken Salad:

  • Step 1: Poach the chicken. I used two pounds of thawed boneless skinless chicken breasts for today’s recipe. Put the chicken into a large pot and fill it with enough water to cover the chicken. Put it on the stove on high heat. When it begins to boil, turn the heat down to a simmer and cook for 20 minutes.
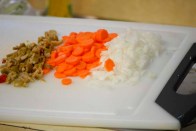
  • Step 2: While the chicken is cooking, chop your vegetables. I use Vidalia onions, carrots and green olives. Put them together into a large bowl. I usually prefer using celery for crunch vs the olives but I was out of celery. You can use any combination of vegetables, fruit or nuts and/or pasta as you prefer. TIP: Elbow macaroni works great. One of my favorite people prefer sweet pickles, green peppers and onions. Just take care not to overwhelm the chicken. I used about 1 cup of onions, half a cup of carrots and about 1/3 cup of olives.

    Vidalia onions, carrots and green olives

    Vidalia onions, carrots and green olives

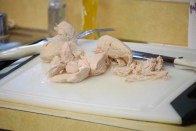
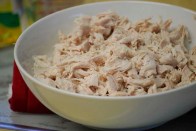
    • Step 3: Chop the chicken. When the chicken is done, put it onto a chopping board and cut it into small pieces.
Poached Chicken Breast

Poached Chicken Breast

Cooked chopped Chicken Breast

Cooked chopped Chicken Breast

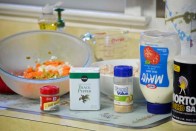
    • Step 4: Mix the veggies. You’ll notice that I haven’t used any seasonings to this point. Now I add seasonings and mayonnaise to the veggies and mix. Today I used about half a teaspoon each of salt, white pepper, garlic power and dill weed and about a cup of mayonnaise; adjust the amount to your liking.
Chicken salad ingredients

Chicken salad ingredients

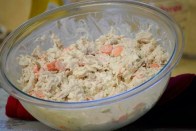
    • Step 5: Mix in the chicken. Fold the chicken pieces into the veggie mix and you are done.
Chicken salad

Chicken salad

You’ll notice I used a large glass bowl that has a lid. Be sure to cover this and keep refrigerated. It will keep for about 3 days in the fridge. I don’t believe this would freeze well as the onions would become wilted.

Suggestions for serving:

  • By itself in a bowl
  • Atop a lettuce leaf in a bowl – adorn with chopped tomatoes
  • On rye toast with a slice of Havarti (oh yeah)
  • On crackers with some white Zinfandel wine

You can use this same method for tuna fish salad – just add some elbow macaroni for a full meal. I haven’t tried it with any other type of fish – if you do, let me know how it goes.

Enjoy!

Crock a Chuck Roast

In my previous post Crock a Roast, I used a top round roast. Although the techniques used to make the roast were OK, the meat itself came out tough. A coworker who had done butchering work in a past life recommended I use either a chuck roast or bottom round – with chuck roast being preferred. The top round is too lean for the way I’m cooking it but the chuck roast has good marbling throughout.

While I’m not an avid fan of fat – I decided to try the chuck roast. Am I glad I did! It turned out beautifully. Here are the steps:

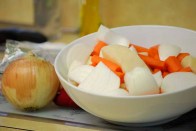
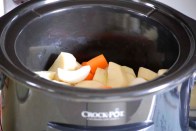
  • Step 1: Chop the vegetables. Today I used carrots, Vidalia onions and potatoes. Put them into the crockpot. TIP: Vegetables go into the bottom of the crockpot – meat goes on top.
    Vegetables ready for crockpot

    Vegetables ready for crockpot

    Vegetables in crockpot

    Vegetables in crockpot

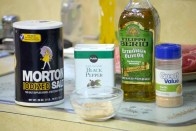
  • Step 2: Season the roast. I prefer to keep it simple and let the flavor of the meat shine through. I use salt, pepper and garlic power. I oil the roast and then rub the combined seasonings on the meat prior to putting it into the pan to sear.
Chuck roast rub

Chuck roast rub

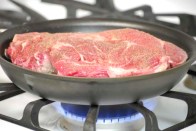
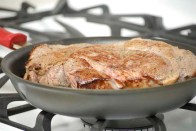
  • Step 3: Sear the roast. Select a pan into which the roast just fits; this helps sear the edges. Heat the pan and add the meat. Let it cook for about 3 minutes on each side. Make sure you sear the sides and ends as well. You will have a nice brown color on all sides when you are finished. TIP: Use a large meat fork to hold the roast up to sear the edges.
Begin Searing Chuck Roast

Begin Searing Chuck Roast

Seared Chuck Roast

Seared Chuck Roast

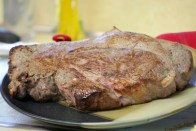
Seared Chuck Roast ready for Crockpot

Seared Chuck Roast ready for Crockpot

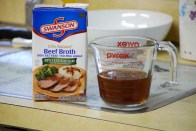
  • Step 4: Add liquid and cook. Add 1 cup of lower sodium beef broth to the crockpot and place the roast on top of the veggies in the crockpot. Set the temp to low and the timer for 6 hours.
Crockpot liquid for chuck roast

Crockpot liquid for chuck roast

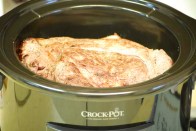
Chuck roast atop vegetables in crockpot

Chuck roast atop vegetables in crockpot

  • Step 5: Make the gravy. About twenty minutes before the roast is done, gather the ingredients for the gravy. This gravy is actually called ‘Quick Brown Sauce’ from the Joy of Cooking cookbook. I leave out the wine and port which gives me a sweeter gravy – you can adjust as you want. I use the cooking liquid from the crockpot as the broth base for my sauce. When the crockpot is done, remove the roast and veggies to a large serving dish and pour the cooking liquid into a measuring cup – you need about 2 cups for the gravy.
Joy of Cooking Cookbook

Joy of Cooking Cookbook

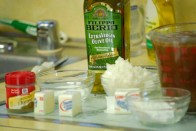
Gravy Seasonings

Gravy Seasonings

The ingredients are flour, sugar, butter, onions, olive oil and thyme. The recipe calls for vegetable oil; I prefer olive oil. In the picture you see 2 cups of the cooking liquid from the crockpot.

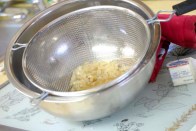
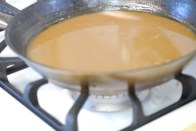
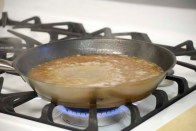
  • Step 6: Following the recipe (I halved it), you will make a roux on the stove. Melt the butter and cook the onions for about 3 minutes, add the flour and cook until it is brownish – about 5 minutes. Whisk in the cooking liquid and cook until it thickens. Strain out the onions if you wish. Because I halved the recipe and left out some liquid, I had to adjust the amount of flour until the gravy was as thick as I liked.
Boiling the gravy base

Boiling the gravy base

Strained gravy base

Strained gravy base

Gravy aka Quick Brown Sauce

Gravy aka Quick Brown Sauce

  • Step 7: Serve. TIP: I didn’t eat this at all this day – I packed it into individual lunch containers for the freezer. It made 9 servings so I estimate it would save me about $90 by eating this for lunches at work instead of going out.
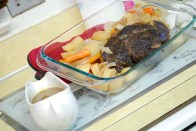
Chuck roast and gravy ready to serve

Chuck roast and gravy ready to serve

Some alternatives to my method:

  • Substitute other vegetables – I use celery instead of potatoes. In that case, serve with a side of noodles or make mashed potatoes
  • Use the cooking liquid as-is instead of making a gravy
  • Use store bought gravy instead of the cooking liquid

Let me know how you do on this…

Veggie Freeze Out

Vidalias Are Here! Just in time! I’ve waited a whole year and I just ran out of my stock from last year.

Vidalia Onions are the sweetest, best onions on the planet – IMHO — and well they are endorsed by Bobby Flay – check it out here.

So when I spied those lovelies in my store, I grabbed a 5 pound bag and couldn’t wait to put them to work. I also bought some carrots and potatoes that day. As you know, I like to make big batches and use my freezer to store my creations. So today, I chopped and peeled and bagged and froze. It was all good. I’d like to share my process with you in case you would like to freeze some veggies too.

I made two general batches — one roasted and one diced — for the freezer. Here are the steps for the roasted batch:

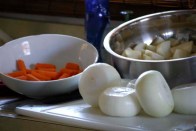
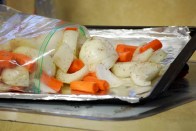
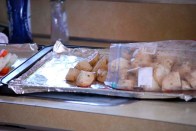
Step 1: Peel and wash six large russet potatoes, six large Vidalia onions and a bunch of carrots and then chop them into approximate 1 inch pieces. I usually put the carrots and onions in one bowl and the potatoes into a separate bowl. TIP: Larger, thicker pieces take longer to roast than skinny ones – keep the same sized pieces together on one pan for roasting; this allows you to remove all the skinnier pieces at once to keep them from burning while allowing the others to continue roasting.

car_pot_on_chop

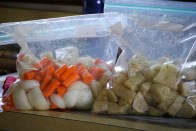
Step 2: Bag and season the chopped veggies. TIP: You can do the chopping and seasoning ahead of time by putting the veggies into bags for the refrigerator. Of course you could just season in the bowls to save the bag. I had an appointment so I had to make these ahead today.

veg_season_bag

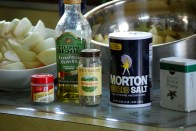
When seasoning, use olive oil and your choice of herbs and spices. I use half a teaspoon each per bag of rosemary, dill weed, salt and pepper. Seal the bag and shake it up to mix and distribute the oil and seasonings.

seasons

Put the bags in the refrigerator for later or continue on with the roasting.

Step 3: Ready pans and oven. I use foil lined cookie sheets. There is no need to oil the pan as we use olive oil in the seasoning bag. Preheat the oven to 325 degrees F.

Step 4: Put the veggies on the pans.

spill_carrot                                                                       spill_pot

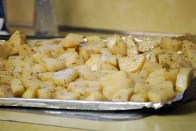
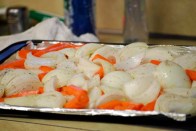
Spread them out evenly on the pans, making sure they are laying as flat as possible. TIP: Try to keep the onion in chunk form rather than letting it separate into its layers; individual layers may burn during the roasting.

flat_pot

flat_carrot

Step 4: Roast. Put the pans into the preheated 325 degree F oven. The length of time you let them cook depends on the vegetables you use and their thickness. In this case, I set the time for one and one-half hours. At that time, I’ll test the carrot and onions. The onions should be done at that point. Because these carrots are skinny, they may also be done.

I’ll leave the potatoes in for about 2 hours and then check them using a fork or knife. You should be able to pierce them to find a soft center – that’s when they are done.
Step 5: Remove from the oven. When they are done, remove the pans and let cool on their pans. You can use them immediately or bag them up for the freezer. I usually put them in quart freezer bags and then put the quart freezer bags into a gallon freezer bag. This minimizes freezer burn when removing a small amount at a time from your freezer stock. TIP: Use them for your sides with dinners by warming in the oven or microwave. So good.

I’m sitting here writing this with the wonderful rosemary and dill smell floating around me. Nice!

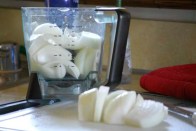
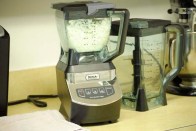
While the Vidalias are in season, I dice and freeze them in one cup bags for use in recipes throughout the year. It’s very easy; I say that –  I use my Kitchen Ninja to do the dicing. You can do it with a knife or other food processor just as well – just takes longer. (That reminds me, I cracked one of my Ninja pitchers with hot liquid (potato leek soup)  – have to order a replacement.) Here are the steps:

Step 1: Peel and coarse chop the onions. Put them in the Ninja.

load_ninja

pulse_ninja

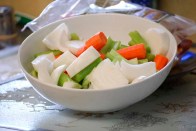
Dicing is done! I do a few pitchers so I empty them all into a big bowl to make the bagging easier.

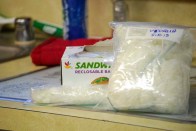
Step 2: Bag the onions. I use sandwich bags and a half cup measuring cup to bag the onions. I put one cup into each bag, expel as much air as possible and then put them into quart size freezer bags.

onion_bagged

Step 3: Put them into the freezer. That’s it – you can just pull out one sandwich bag at a time for use in your favorite recipes.

TIP: I wouldn’t use the frozen ones for a raw preparation like a salad; always use fresh onions for raw preps.

Enjoy!

Treasure Hunt

School will soon be out! If your kids are like mine, they will be bored by week two. Add a rainy day and they will be lining up for entertainment – that would be you! Enter ‘Treasure Hunt’. This game is easy, quick and cheap – or it can be as complex as you’d like. I always enjoyed the ‘king’ theme. As the name implies, the children will be questing throughout the kingdom for the prize.

  1. Choose a theme. MM900046593(1)
  2. Hide the prize. While the questors are putting on their costumes, hide the prize. What is a good prize? This again, depends on how much you want to give and the likes/dislikes and ages of the questors. Remember, you may play this several times this summer so I would keep it small. If I planned ahead, I would buy a small trinket for the prize – a favorite toy or book. Again, if you planned ahead you could wrap it – that adds to the excitement. If you didn’t plan ahead, just use some money or a coupon for a special treat. The treat could be the right to decide what to make for dinner.
  3. Make the clues. MM900303301Use small strips of paper. The clues lead from clue to clue to eventually the prize. The clues are written with the ages of the children in mind. You can draw pictures instead of words if needed. Here’s an example: Under oldest child’s pillow. Then put the next clue under that pillow. TIP: Be sure to put the clues in safe locations.
  4. Hide the clues. First check to make sure nobody is peeking! If you wish, you can make enough clues for everybody find or just one. You can also make several routes through the house for the hunt. I know – this could be as adventurous as you want!
  5. Assemble the participants. ??????????????? Explain the rules. My rules are:
  • No running
  • No making messes – search carefully and put things back the way you found them
  • No climbing
  • If you have just one clue at each place, the finder must read it aloud and discuss where the next clue might be with the group (rather than just running off with the clue – what fun is that?).
  • If the prize is wrapped, it must be brought to the kitchen for a group reveal

And they’re off and not running to find the first clue. You may have to go with them the first time. As time goes on you can be more creative with the clues.

Have fun! MC900441717

Mechanicals Happening

The rehab on the house continues and is coming together. The focus during the last two weeks was on the mechanicals and upstairs bath. The items to be completed are being whittled away. Kudos to my contractors – they have day jobs and their own homes to work – but still they are making great progress on my house – thanks guys!

One setback occurred: the water company came to turn on the water and we discovered we’d failed to plumb in for a water meter – doh! We need the water to do the drywall next week. It’ll be tight to get it all done – may have to put off the drywall. Rats

The mechanicals included putting in a new electric box, a new water heater and finishing the water lines. Of course all the copper had been pulled out before I bought it. new_elec_box Strange thing, the electric had been turned on but I haven’t received a bill. hmmm – I better call them before I get a huge bill.


new_water_heater  new_water_piping


The upstairs bathroom was completely stripped when I bought it and the laundry hookups were down in the basement. I wanted the laundry facility upstairs. So the guys ran pipes up and are framing in a laundry ‘closet’. wash_dry_closet_frame

Although I would have preferred a cast iron tub, I didn’t want to put that weight on the 2nd floor. So, we went with an acrylic tub with a surround. The guys had to frame it in. new_bath_enclosure I think the shower head is a bit too high but we can fix that later.

Coming up: plumb a water meter, replace downstairs shower stall and drywall.

Crock Chicken Pot

If you’ve been reading my posts, you know that I’m a big crock pot fan. Making good use of a crock pot and a freezer can be a life saver for a working mom. There’s just something great about coming in the house after a busy day to the smell of something good cooking – especially in the winter (if you live in a cold climate you know what I mean). This recipe makes ten good size portions in a full crockpot.

Here are the steps I use to make what I call ‘Crock Chicken Pot’. TIP: You can also make this in a covered casserole dish in the oven if you want.

Step 1: Assemble your ingredients

  • Fresh Vegetables. I use Celery, Carrot and Onion
  • Cream of Chicken and Mushroom soup. 3 regular size cans. I use Campbell’s Healthy request most of the time.
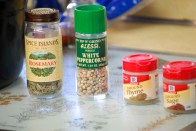
  • Seasonings. I use .5 teaspoon each white pepper, rosemary, sage and thyme. Adjust to taste.
  • Chicken. 3 – 4 pounds of skinless, boneless chicken breasts. Thawed or Frozen.

Step 2: Cut the vegetables into inch thick pieces. veggie_bowl Set aside. TIP: Cut the veggies and mix the sauce the night before. Save the mixture in a zip lock bag. In the morning just dump it into the crockpot.

Step 3: Make the sauce.

  • Empty three cans of soup into the crockpot. You could also use Cream of Celery. Adjust the type of soup used according to your taste. TIP: Save money by buying the family size cans if they are available. soup
  • Add seasonings and stir. seasonings

Step 4: Assemble in the crockpot. The sauce is on the bottom, then add the veggies and finally the chicken. all_in_crock

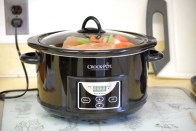
Step 5: Cook. If you used frozen chicken, set the timer to 6 hours on high. If you used thawed chicken, you can set it to 4 hours on high. TIP: If this needs to cook the entire work day, set it to 8 hours on low for either frozen or thawed chicken. I bought the crockpot with the keep warm feature in case I don’t make it home in exactly 8 hours (who does?). crock_setting

Step 6: Serve. I usually make a big pot of rice to serve with this dish. You could use noodles also. TIP: You could make the rice/noodles the night before and just warm in the microwave to serve. I freeze leftover rice/noodles for future use with this recipe.

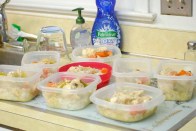
Leftovers! As this makes more than one meal, you can portion and freeze for lunches or even faster dinners. This cooks beautifully in the microwave at work. freezer_bowls For this recipe, I save about $80 for work lunches vs going out.

Enjoy!